We all agree that Google Search Engine is a powerful tool, but exactly how powerful is it?
Based on the LIVE statistics presented by InternetLiveStats, 4,827,158,202 Google searches are made every single second.
Statista’s latest update, gives us data that further helps prove Google’s reign.
In July 2020, approximately 87% of internet searches from desktop were perfor
med using the Google search engine. When compared to Bing (second-leading search engine), Google searches from desktop are through the roof. Bing only amounted to approx 6%, which is a huge difference.
These and hundreds of such statistics are the reasons why your URL needs to be indexed. To answer the repeatedly asked, “How do I submit my URL to Google” or “How do I add my URL to Google” and other variations of the same question, we have prepared a detailed guide.
The guide will help you create Sitemaps, submit your website to Google using sitemaps as well as by requesting a crawl.
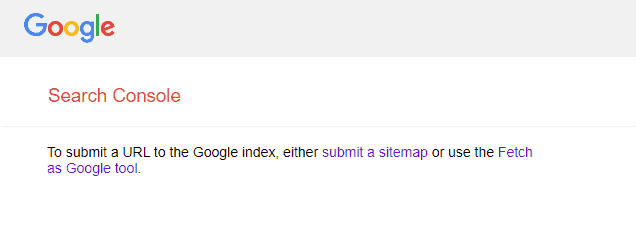
In general, Google does the indexing on its own, but it might take a long time for the Google bots to crawl your website, maybe a few weeks or even months. To ensure quick indexing, manually add your website or URL/URLs to Google. There are two ways in which you can take care of website submission to Google.
- Submit A Sitemap
- Fetch as a Google Tool
As a professional SEO agency in Mumbai we have provided a list of things you’ll require to make the process of website submission to Google as smooth as possible.
What Do You Need to Submit a Site to Google?
- A LIVE website/blog/URL.
- An email address: If you don’t have a Gmail address, you can sign up for a Google Account.
- Sitemap: We’ll show you how to create a simple XML sitemap.
- Robot.txt File: We’ll also tell you how to configure the Robot.txt file for uploading a sitemap.
Throughout this guide, we’ll use the following example website and related URLs to explain how URL submissions are done.
https://www.website-example.com
Let’s first create a Sitemap for your website.
You’ve Finally Found the Right SEO Agency!
Capsicum has the SEO solutions you’ve been searching for. Don’t let another day go by where your competitors are looking down on you! It’s time to be discovered!
Get Started NowHow To Create An XML Sitemap?
How To Create XML Sitemaps Using Free Sitemap Generation Tools?
We’ll provide you with links to appropriate tools that you can use to generate sitemaps in a few simple steps within a few minutes. These plugins will create sitemaps and upload it to your website’s root directory or specifically to the robot.txt file. So, once you have generated a sitemap, you’ll have to submit in Google. There are three different ways to do it.
We’ll talk about those once we create sitemaps. Some Websites Building Platforms such as Wix and Blogger, automatically generate a sitemap for your website.
We will begin by providing resources required to create a sitemap for a custom website that doesn’t use such platforms.
Want to create a custom website? As a notable web development company in Mumbai, we can help!
How To Create A Sitemap For a Custom Website?
Google has created an extensive third-party Sitemap creator tools list, we have shortlisted a few from those below. With some tools, you only need to provide your website URL to generate sitemaps.
While there are others like Addme.com’s XML generator that require additional data as they can also help you update existing sitemaps.
How To Create A Sitemap For a WordPress Website?
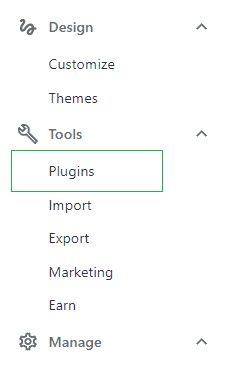
WordPress is the best CMS in the market today. It offers a list of plugins for creating sitemaps; here are two of the most effective plugins. To install and activate either of these plugins, you’ll need to go to your dashboard and select ‘Plugins’ from Tools.
Yoast SEO Plugin
Step 1: Once you have installed/activated the Yoast SEO Plugin, find the plugin on your WordPress dashboard.
Step 2: Select General Settings => Select Features
Step 3: Scroll Down, find ‘XML Sitemaps’ and enable it. When you enable the feature, the Yoast SEO plugin automatically generates a sitemap for your website.
Step 4: To view the sitemap generated, first click on the ‘?’ symbol visible next to XML Sitemap. Then click on the See the XML sitemap.
To know more about the plugin visit: Yoast SEO Plugin Link.
Google XML Sitemaps
Step 1: Once you installed the Google XML Sitemaps plugin and activated it, the plugin automatically generates the sitemap for your website.
Step 2: To view the generated sitemap, open a new browser tab and add your custom URL: Your website name followed by /sitemap.xml, as shown in the following example.
Step 3: For additional settings, go to your WordPress dashboard. We have to check whether or not the search engines have been notified of the generated XML Sitemaps.
Step 4: Select Settings => Now select the XML Sitemaps option on the Settings dashboard.
Step 5: Click on the Notify Search Engines.
To know more about the plugin, visit Google XML Sitemaps Plugin Link.
How To Create A Sitemap For a Blogger Website?
In case, Blogger doesn’t automatically generate a sitemap for your website, follow these steps:
Step 1: Visit Labnol’s Blogger XML Sitemaps Generator.
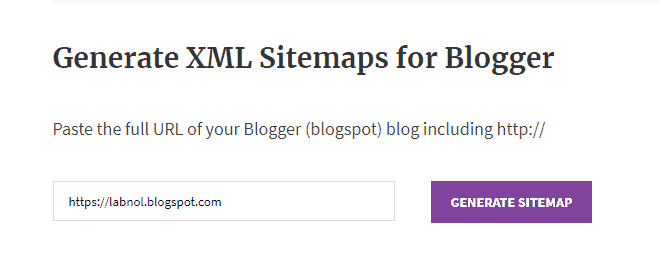
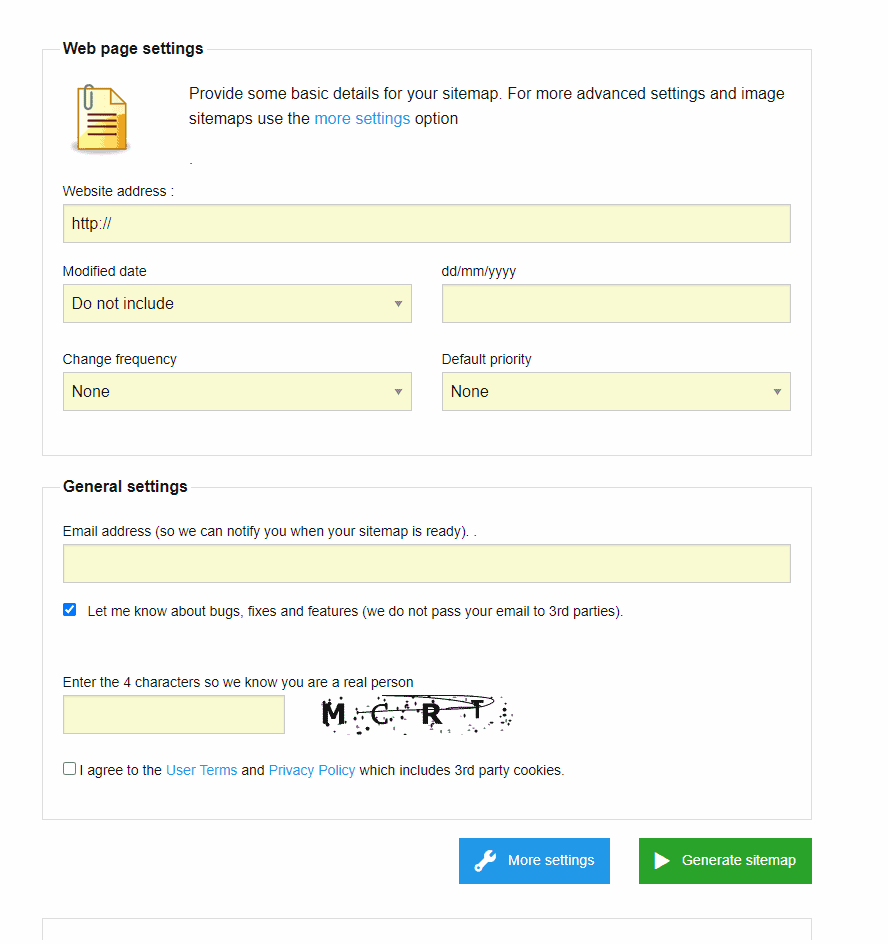
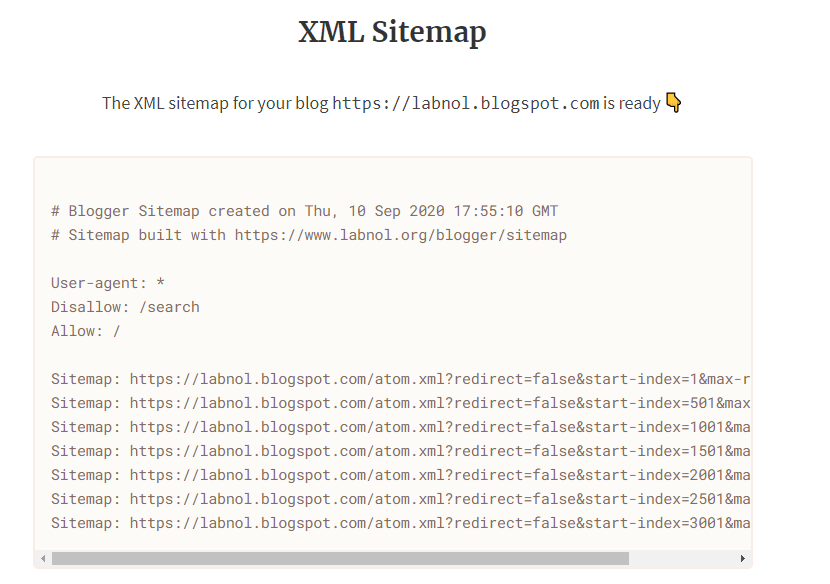
Step 2: Enter your website URL: https://website-example.com and hit the Generate Sitemap Button. Your sitemap will be presented to you as follows, copy and save it.
Step 3: Log in to your Blogger account and go to your Blogger Dashboard.
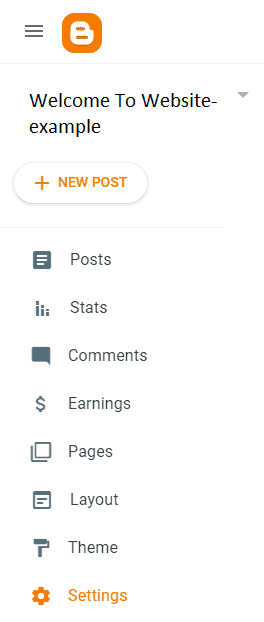
Step 4: Select Settings – Enable Custom Robots.txt.

Step 5: Add the generated Sitemap to your Custom robots.txt file, save it. The format will be verified and updated.
How To Add URLs To Google?
By Submitting A Sitemap
Submit URL to Google Index with Google Search Console
Remember: Before you submit your sitemap, you need to add your website to the Google Search Console.
Step 1: Log in to the Google Search Console with your Google Account.
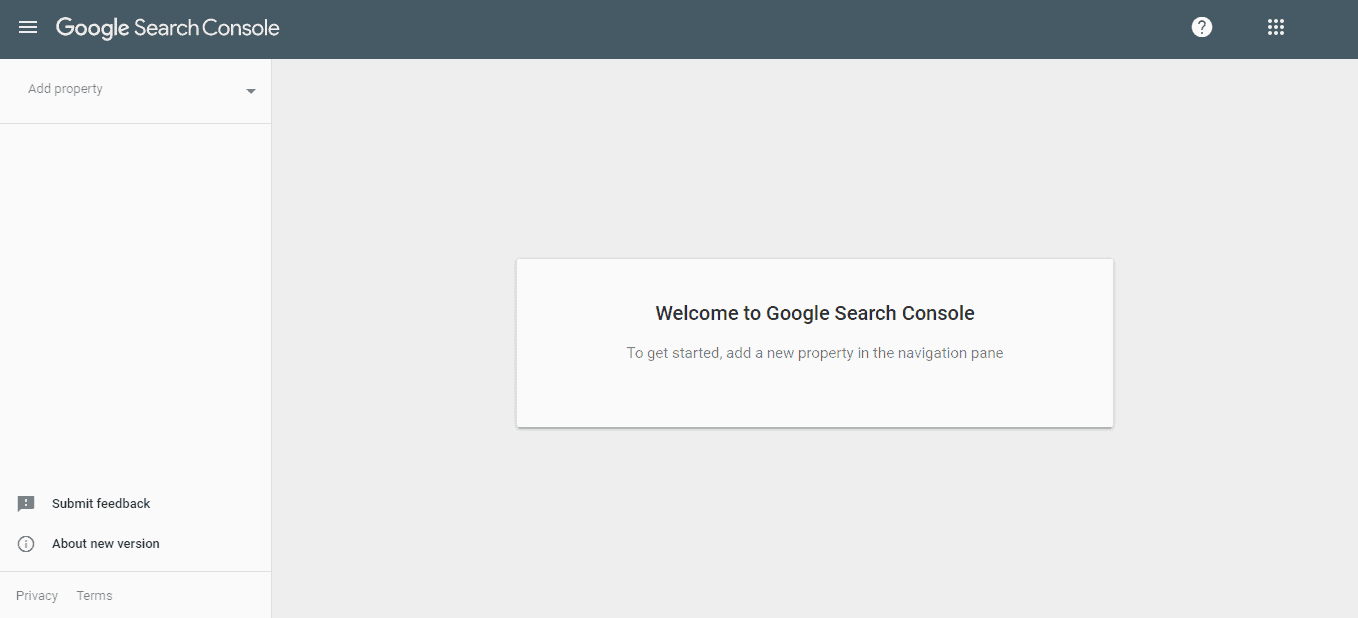
Step 2: Select the Add Property option found on the top left corner, as seen in the screenshots.
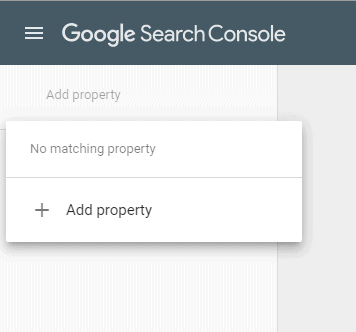
Step 3: After selecting the option, you’ll be presented with a drop-down list. Again, click on the + Add property option.
Step 4: You’ll be taken to Select Property Type screen, where you can add your website or web page URL.
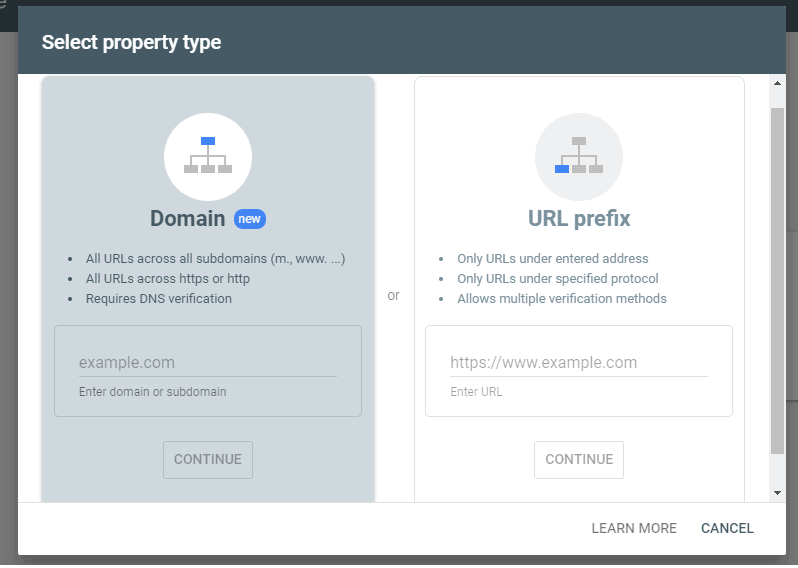
We’ll again use our example website: website-example.com
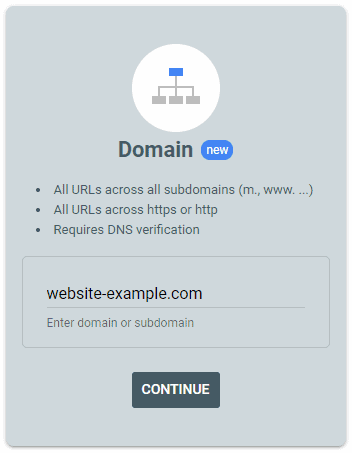
Note: In case you are asked to verify your website by copying a text code in your Domain Name provider, go here to find your Domain Name Provider.
Step 5: Once you have successfully created a new property, go back to the dashboard.
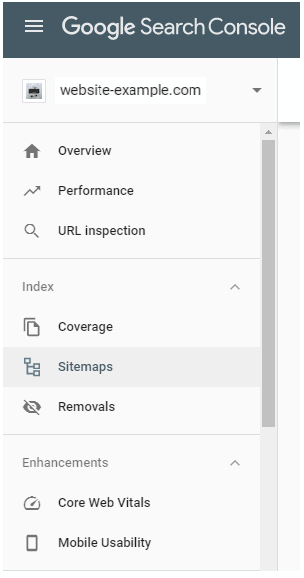
Step 6: Now, click on the Sitemaps option and copy your sitemap XML URL to the Add a new sitemap field on the Search console.

Step 7: An error-free Sitemap will be verified and be successfully added to the Sitemaps list as follows:

This points to successful website submission to Google.
Submit URL to Google Without Signing in (Using Google Ping URL)
Provided that you have generated a sitemap, you can submit in Google using Google’s Ping URL:
Add your website’s sitemap URL after the above Ping URL.
For example: Our website is website-example.com
So, the Google Sitemap Ping URL becomes:
https://www.google.com/ping?sitemap=website-https://www.example.com/sitemap.xml
Submit URL to Google Using Your Blog’s or Website’s Robots.txt File
Having access to the server solves this one quickly. With custom websites, the owner has access to the File manager. It can help you access the robots.txt file from the root directory, but you can’t make any changes to it.
You’ll have to create a robots.txt file, add your sitemap to it, and then replace the existing robots.txt with your custom robots.txt file.
There are two ways to update the robots.txt file in WordPress. The first one uses the cPanel while the other uses plugins such as Yoast and All in one SEO pack.
An example of a simple robots.txt file with a sitemap (For WordPress):
User-agent: *
Disallow: /wp-admin/
Allow: /wp-admin/admin-ajax.php
Sitemap: http://www.website-example.com/sitemap.xml
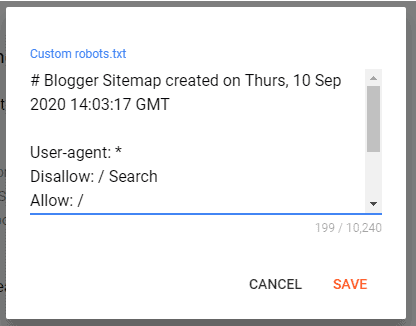
As we have already seen, Blogger, by default, has a robots.txt file. You can copy the generated sitemap into the custom robots.txt file in the settings. First, you have to enable it.
User-agent: *
Disallow: / Search
Allow: /
Sitemap: https://www.website-example.com/atom.xml?redirect=false&start-index=1&max-results=500
Fetch as Google Tool/ Request Indexing
This one’s quite simple. Most of you must have already signed up for Google Search Console. If you haven’t already done it, add a new property (check the initial steps of Submitting a sitemap for detailed steps to add a new property)
Step 1: Once you have added a new property, select it from the drop-down list.
Step 2: Now, inspect the new URL within your website (the selected property):
Our Website: Website-example.com

Step 3: Now, we want to inspect the URL for a new post. So add that URL to the URL Inspection bar, you can either directly add the URL to the bar. Or select the URL Inspection option from the dashboard.
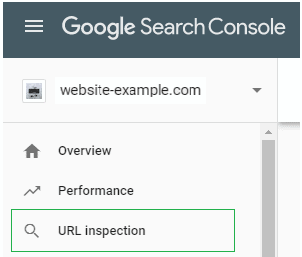
Step 4: In the case of a newly updated URL, the search console will provide us with the following report.
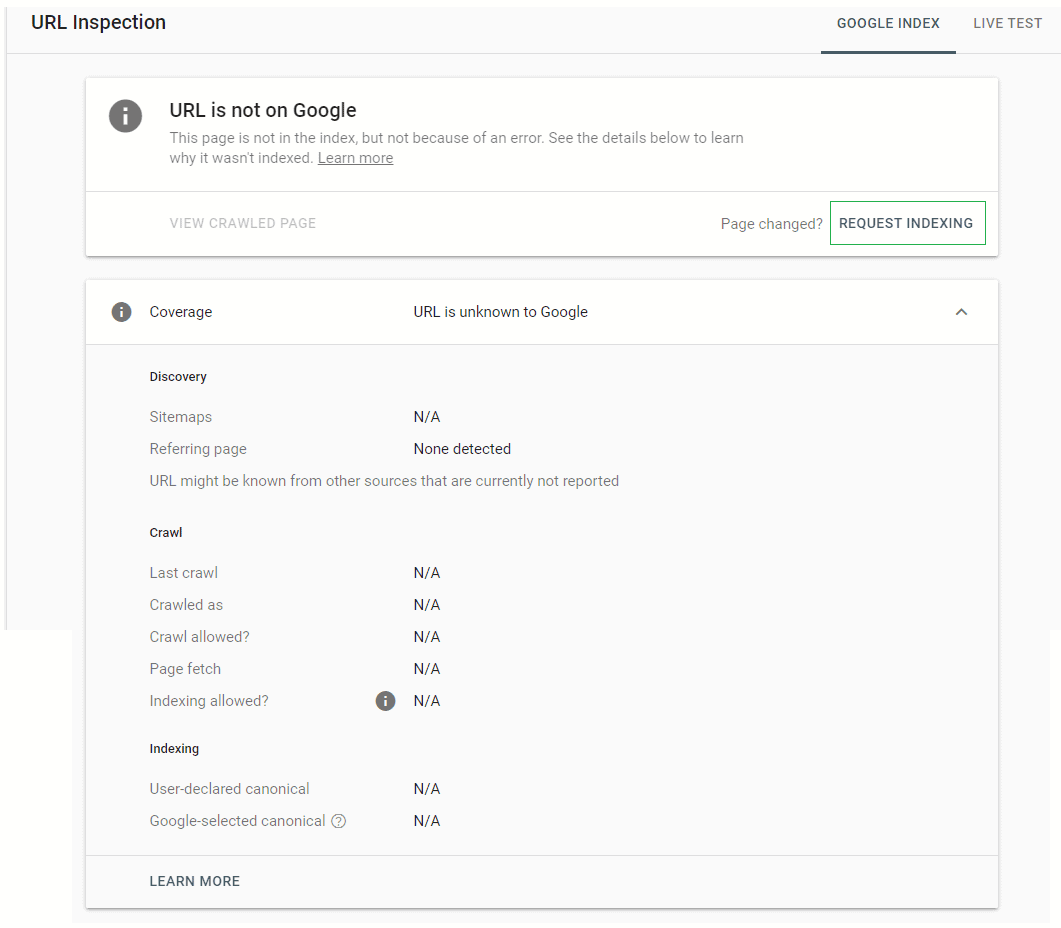
Step 5: To solve this, you have to Request Indexing.

Pay attention to the message: There’s no point in repeatedly sending an indexing request. Once is enough.
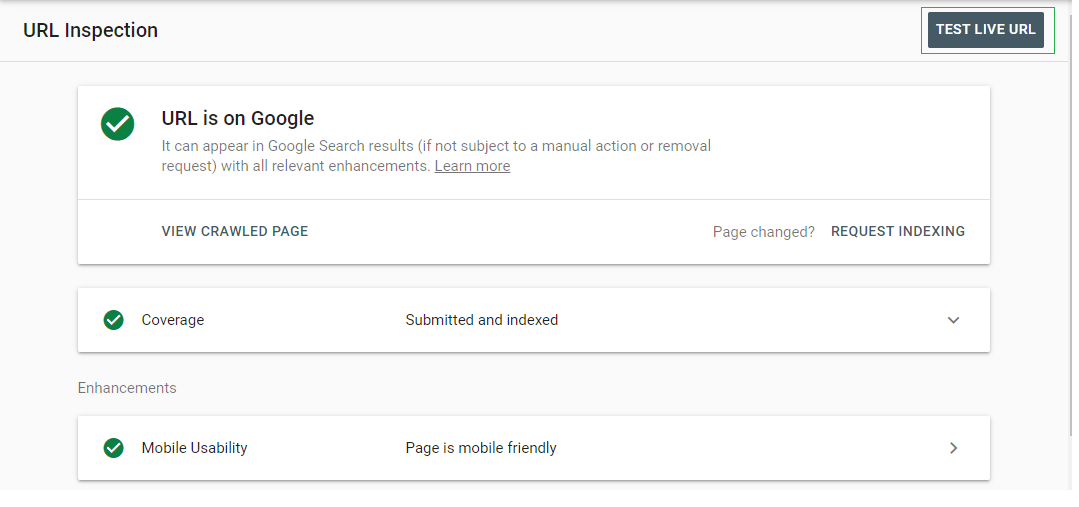
A successfully indexed URL will display the following report. It is proof that your goal to add your site to Google has been achieved.
Want to Skyrocket Your Online Presence? Connect Now!
Call Us Now on +91 98330 94626 (Sales) or WhatsApp Us or send us an email to hello [at] capsicum [dot] in to discuss your project further!
- 45+ Strong Member Team.
- 650+ Clients Served Globally.
- 15+ Years of Experience.
- 23+ Int’l Countries Served.
To sum up;
Sitemaps, Robots.txt, and Google Search Console are the three most essential things to submit URL to Google index. Submitting a sitemap helps you submit multiple URLs to Google in one move. In terms of SEO, a well-structured website indexed by Google will rank higher than websites that don’t have these set-ups. You’ll lose valuable time, waiting for Google to crawl your website. That time might not mean a lot in terms of regular activities, but in terms of website rankings, quite a lot can happen.
Once you have set up your site, you can focus on your website’s on-page and off-page SEO. These are the tools that will put you in the path of your potential customers.


